Thursday, April 29, 2010

post number 79


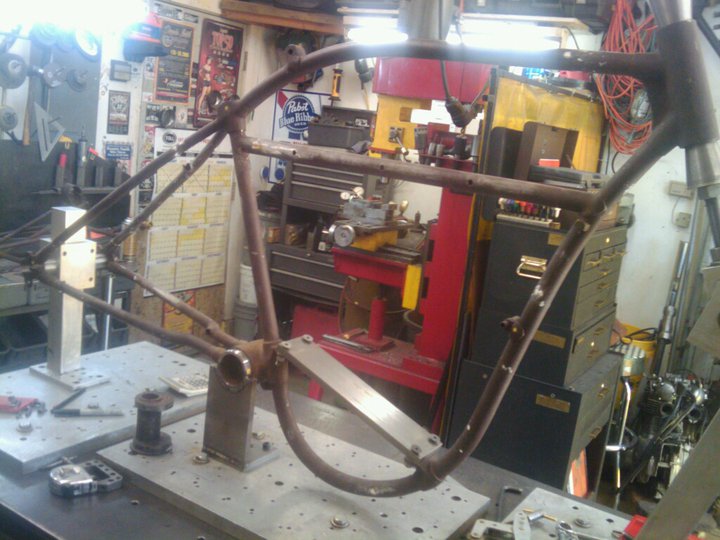
Here is the set up for cutting the taper in the bottom frame rail. There is a .110 taper over 8.625 inches. I don't know why anyone would even bother to design such a small taper into a manufactured part. I have no choice but to replicate it, since I want the frames to be perfect. This is a finished piece after cutting and filing. It turned out really well. The wall thickness at the small end is still .125 , so it is far superior to an og frame.


The first step was to cut the one end down to .745, then I set it up in the lathe between centers and cut away.

Tuesday, April 27, 2010

post number 78


Here is a picture that my friend Chad sent me. He is helping me out with the frame chore. He got most of the jigs made up to complete this job, now he is moving onto the castings. I am very fortunate to have a good network of friends that I can work with in order to move a huge project like this along.


I have been working on this fork fixture all day. What a bunch of work. It is turning out really well though. I will be able to finish it up in the next day or two. I am going to go back to work on customer stuff tomorrow, so the progress will not be as substantial as today.


I took this pic so you could see the tap that I busted and how narrow this frontend actually is. I have to widen it 3/4 of an inch, but I will have something to go off of. Wish me luck, and good night.

post number 77


So here is a pic of the fork diving boards after being cut off and rewelded back in the correct place.


HEre is a pic of the bottom after all the metal finishing


And the top. It is pretty seemless. What a lot of work, check out the previous posts to see how crooked they were before.

post number 76


Well I have been having fun with forks all day. I took the day off of work to get some things done on my sears project. I honed out the fork stem hole so that I had a .005 press fit between the stem and tripple tree casting.


Here is a pic of them being pressed together. I knurled the stem so that the lower bearing race would press onto the bottom of the stem. og stems had a .005 larger sleeve, but I couldn't get the right material for the blanks, so I had to compromise.


Here it is all pressed in! There is a .060 groove all the way around the stem for good weld penetration.


And all welded up. This will never go anywhere!


post number 75


Check out this neat setup for machining out the muffler castings that I just got. This seems to work well, I can get them dialed in within fifty thousandths which is pretty good for a rough sand casting lol.


These two castings were the samples from the run that I made. The foundry was a little excessive when they ground the flash off of the end. I had to cut this one up a little to turn it into a use able piece. Luckily they hadn't ground any of the other ones. I like doing that work myself, then if it gets messed up I can only be mad at myself.

Monday, April 26, 2010

post number 74


My daddy drilled out the .625 holes in my fork diving boards, they turned out well, now I just have to cut them off and weld them on straight.


I got my muffler castings in the mail for approval today. They castings turned out really well, I told them to not grind anything off of them because they were a little excessive on the prototypes.


Here is the small end. What a cool deal. I am going to run an aluminum one on my cannonball bike, it is half the weight.


Check it!

Sunday, April 25, 2010

post number 73


My daddy is helping me out today and machining up the triple tree castings. Before we could machine them we had to straighten out the diving boards. I had problems with these breaking off in the wax stage of casting, so I asked the foundry to set them up in the right spot before they cast them. Everyone of them was crooked and most of them have to be cut off and re welded back onto the casting which is a lot of work, but it kind of fitsthe theme of this whole project lol


While my dad was working on castings I was working on my fixture for brazing the fork together. Here is the top clamp for the fixture. I spent most of the morning on the phone getting measurements from all over the country.


We machined the bottom tabs down to .315 just like the originals! The bar between the two pieces is the bottom part of my fixture. Lots of work and ciphering

Saturday, April 24, 2010

post number 72


So I decided to go back out to the shop and make my bottom fork stud plates. The og ones are .312 thick, I didn't have any 5/16 plate but I did have some 3/8 ground steel plate from a tooling project from last year. So I am running a little beefier bottom stays. This will be advantageous for the cannonball run!


Here they are roughed out and with the holes drilled.


Here they are finished. This is a lot of work, and iwill probably have them lasered out from now on.


That was not enough so I decided to try and make my first bung for the front strut. I did a good job of cutting the radius and then cutting the groove in the center, but the only problem was that since I am using a thicker plate I ended up cutting quite a bit off of the length when I cut the wider groove. This mistake cost me an hour of my life that i will never get back lol, but I learned a good lesson, and the next parts will be better because of it!

post number 71


Here is a pic of me cutting threads on my sears fork stem.


Here is a pic of the top all finished up. Check out the little .125 groove that I cut in the stem. Delmar made the crown nut and lock nut.


Here is the finished piece. I had to knurl the base of it so that the bottom race would press on. Lots of cool stuff is happening so stay tuned!!!!!!!!!!!

Thursday, April 22, 2010

post number 70


This is probably the last time my flywheels will ever be completely apart


Here is a pic of me pressing the crank pin into the left flywheel.


Pressed in and ready for service! I actually have to do some machine work on the other side. It is some pretty wild stuff. Photos will follow.


Here it is all together. am so excited!

Tuesday, April 20, 2010

post number 69


I just got this picture on my phone of the bottom tripple tree castings that my friend Chad machined up. I should have them by the end of the week. Stuff is going to start happening pretty fast, so don't blink! lol

Monday, April 19, 2010

post number 68


I received my sears carb back from Liberty in the mail yesterday. It is so perfect. Tom Cotten is a true craftsman.


I also mounted the tire on my front wheel. This is the gaudiest wheel I have ever had and I love it!

In work out news, I have dropped down to 192 pretty fast. Circuit training is brutal. It has been very effective at getting my body to tighten up and shed pounds. I have lost 15 pounds for the race already. I want to get down to 185 for the race, which is totally feasible. Wish me luck

Thursday, April 15, 2010

post number 67


Check out my front wheel! This is such a sight for sore eyes! I am going to go mount the tire! Which side do you think I should put the brake on? Is one side more advantageous than the other?

Tuesday, April 13, 2010

post number 66

Here is the musselman hub that I got from my friend in California. It is a spot on reproduction of a sears musselman hub except it is a 36 hole rather than a 40 hole. I messed up when I ordered it and have to send it back. It's all good though. I took this pic before I sent it back.

Here is the cover for the left side of the triumph hub. I had it nickle plated. It turned out well.


Here is the oiler casting, The foundry was pretty Conservative when they cut the part off of the tree and unfortunately they cut off a little more metal than they should have. Check out the post that comes out at a 45 degree angle.


Here is a pic of the same casting next to one that I put some metal on. It worked well.


Wednesday, April 7, 2010

post number 65


I got some neat parts in the mail today from north dakota, these are fender mounting pieces, front fork spring retention plates and locking washers for the front fork. Pretty good stuff.

I also got a neat hot air intake for my carb, but I forgot to take a picture of it. I will post a pic later.

Sunday, April 4, 2010

post 64


The lever on the left is the one that I tried drilling free hand. I suck at anything freehand, fortunately I am good at making fixtures. Once I made a simple mill fixture I turned out nine use able perfect pieces!


Here is a completed lever. This is for the de compression and mag advance.

Here is the bung that I made for my gas valve. It turned out well. I am using a 1916 to 1939 petcock.


Here it is all welded up. I also finished welding up my gas tank. I measured all of the seams that got welded up and there was over seven and a half feet of welding that had to be done!


Saturday, April 3, 2010

post number 63


Here are the top and back pieces for the sears oil tank.


Here are the bottoms after being bent around and into shape. They turned out pretty good and are very close, but still require a lot of fitting, bending and work to make work.


Here are the baffles and the tops.


Normal bungs are just soldered to the back side and flush with the tank. I drilled out the original .1875 holes to .375. Then I cut a .045 deep shoulder on the bungs. This is what the assembly looks like before welding. Check out how the bung is flush with the top surface of the tank.


Here is one all welded up. This works pretty well.