Thursday, January 28, 2010
post number 42
My dad and I went on a field trip up to Lehr North Dakota today to sort out some engineering issues that showed up. I think that we have everything sorted out. These are the prototype pins that Delmar and Todd made up. They are exactly like the blue prints that we made a couple weeks ago, but they will not work because the blue prints were not that good! My dad and I over looked a couple of clearance issues and we had to modify our plan. The four of us spent five hours looking at 95 year old sears parts and brainstorming and came up with a solution that we all agreed on. I will post some more pics as things progress on the motor front!
Here is Delmar's new 9 axis machining center. This thing is huge.
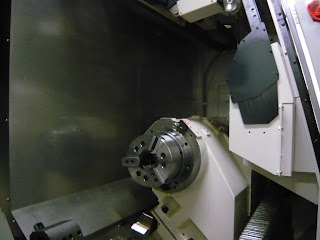
If there was a tornado in the area, or a nuclear attack, I would hide in here
Wednesday, January 27, 2010
post number 41
Here is the set up for machining out the old valve guide. I dialed in the outside diameter of the o.g. guide and locked in my mill, then I machined it out and drilled and tapped the head for a 9-16 18 tap. After this set up, I had to flip the cylinder around and mill out the piece of metal that was still in the combustion chamber. I also spent an hour polishing the bases of the cylinders and the wall. They glow like diamonds and look amazing. It is pretty close to the o.g. plating on my original spacke cylinders.
HEre is a pic of the valve guide being threaded. We were able to modify big twin sidevalve valve guides from rowe. They are made out of cast iron which is ideal.
Here is a pic of the modified valve guide next to the donor one. This is a fix that my friend Steve recommended, and I think that it makes a lot of sense, The cylinder does not have very much meat to it after machining, so I would be a little apprehensive of a pressed in valve guide. I will give this a try and hopefully it will be a trouble free fix.
post number 40
I got my cylinders back from the plater today. They turned out well. There are some pits in the base of the rear cylinder, but it is standard bore and really nice. There were a couple spots that had brazing and silver solder used for repairs. I was concerned that the different color of metal would show up after plating, but I am happy to report that this was not an issue.
WOW these things are so pretty! I am going to try to sort out my valve guides this week.
Saturday, January 23, 2010
post number 39
I have been thinking about moving my oil tank to my tool box. Then I would have more gas capacity and would be able to make more distance between gas stops. After our scientific process of south dakota measuring we determined that the tool box will roughly hold three quarts.
My friend Tim Spacke sent me an original oiler to use as a pattern. Here are all the pieces that I have to copy.
Check out this cool detail. the gas knobs say gas! I love old bikes
Thursday, January 21, 2010
post number 38
I welded up my first prototype gas tank. I am not very pleased with it, but it is still really cool to see it in the frame!!! I learned a lot about what not to do as far as bending the blanks. The next one will surely be better! I am glad that I ordered twenty blanks lol
Here are the pliers that I made to bend the sides. They work well and clamp the metal evenly, one thing that i did not for see happening was the metal next to the bend distorting. I am learning so much about metal work with this project, I love my job!
Tuesday, January 19, 2010
post number 37
Here are my finished molds for the sears frame! This is the seat post casting and seat pivot point
Here is the neck casting
Spark advance/decompression release
Front motor mount! I plan on fabbing up the rear motor mount/ eccentric casting and tig welding them together. My original frame is nice, but there are quite a few cracks in it. Repro frames are allowed in the race, and I plan on running a repro chassis for the sole purpose of not having to worry about 100 year old fatigued metal. I should have my waxes next week. Wish me luck I am jumping in the deep end!
Check out the hall mark u casting. It really came through in this mold!
Sunday, January 17, 2010
Here are some waxes for a sears rocker, and the cast lever for the de compression release.
Here is the mold for the decompression release lever. This is the little lever that goes up on the frame.
What a cute little thing.
Here is the first sears gas tank blank that I bent up. It took an hour and a half. I wanted to try bending one up to see what changes needed to be made in the blanks. There are a couple piecesthat I need to sand and modify because of clearance issues with the press brake.
Here it is next to the original sample that Steve sent me. This is a fun project
Saturday, January 16, 2010
post number 35
Tuesday, January 12, 2010
First Non Sears Post!
I have pretty much dedicated the last 5 weeks to working on this bike. A lot of you guys have probably heard about the free wla contest that the amca and I ran last year. Well the guy in between my dad and I is Ryan Mackey, the kid that won the contest. There were over 95 entrees, and he won the bike. It was all in pieces, and we have spent the last five weeks getting it to where it is now.
This bike is bitchin, It is a lot of fun to work with somebody that is enthusiastic about old bikes. Ryan is doing a great job with the bike.
This bike has a lot of neat little details, we have been documenting the whole process over on the amca message board from day one. Go check it out at www.antiquemotorcycle.org there are a lot of neat in depth technical goodies in the thread. Ryan flies back to ohio on sunday, so hopefully I will be able to squeeze some sears work in again!
Thursday, January 7, 2010
post number 34
Saturday, January 2, 2010
post number 33
I started out my year by welding fins onto my three sets of Spacke Cylinders. Holy moly what a bunch of work. They all turned out really well. I still have some grinding to do before I can send them out for plating.
Here is a pic of me making some top fins! I have done a lot of knucklehead fin repair, but they are all square, I had to make an arbor for the lathe to cut some different diameters of fin repair pieces. It turned out well.
This is the same cylinder as the one in the top of the post. Once they are nickle plated, no one will be able to tell that the fins were messed with!
Subscribe to:
Posts (Atom)